Visas and Permits
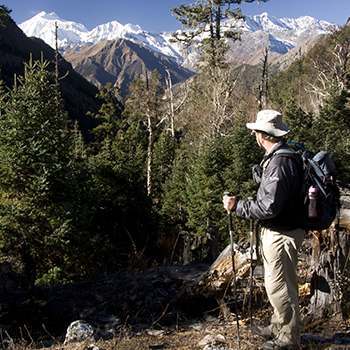
OK, so Visas and Permits are a hot topic and we’ve lost count of the questions that we receive, especially for Nepal. Despite the GHT having been a government priority, permits to trek in Nepal have never been more complicated or expensive. And then there are the tourist visas!
But don’t worry, wherever you want to trek, there is a system in place that a trekking agent can handle. If you have the patience and spare time, why not do it yourself?
Following is a review of the current visa and permit situations in each country, first Nepal, then India and finally Bhutan, which is by far the simplest.
PLEASE CHECK ALL COUNTRY WEBSITES FOR COVID-RELATED ENTRY VISA RULES AND CONDITIONS. IF YOU HAVE ANY QUESTIONS, PLEASE GET IN TOUCH.

Nepal: Visas and Permits
Barely a year goes by without a change to the entry visa regulations to Nepal. You can check arrangements with one of the Nepali embassies or consular offices, but the most reliable source of information is currently the Nepal Department of Immigration website (www.nepalimmigration.gov.np).
Tourist Visas
Many tourists organise a visa prior to arrival in Nepal by applying through the Department of Immigration website (www.online.nepalimmigration.gov.np/tourist-visa). It is also possible to apply for a visa on arrival in Kathmandu at Tribhuvan International Airport (currently US$125 for 90 days, US$50 for 30 days, US$30 for 15 days, payable in a range of major currencies or Visa or MasterCard, see below for more information). The visa available on arrival tends to be cheaper than applying for one from an embassy or consular office. Other entry points are Kodari (on the Tibet border and normally only open for groups), and nine overland borders with India, for current details see the website.
Trekking Permits
Similarly, the trekking permit system undergoes almost constant change. Currently most trekking itineraries require: (1) a National Park or a Conservation Area Permit, and (2) TIMS (Trekkers Information Management System) permit. You may also require a Controlled Area Permit and/or a special trekking permit depending on the region. It is essential that you organise Controlled Area Permits through a registered trekking company, and if this is all you do the company will charge you a processing fee. You should always carry a photocopy of your passport when trekking. Also, be prepared to register at police check posts whenever requested to do so.
Other Registrations
A final formality is to register online, or in Kathmandu, with your embassy or consulate or register at the Himalayan Rescue Association (www.himalayarescue.org.np). If there is no consulate, find out which, if any, country represents your country in Nepal. This can be determined from your Foreign Affairs Department, or corresponding office, in your country.
The essential information required by your embassy is your name, an emergency contact number, passport number and itinerary. It is also a good idea to provide the contact details of your hotel and trekking agency in Nepal should you need to be contacted. One major benefit of this process is to facilitate your rescue and repatriation should it be necessary.
Getting though Tribhuvan International Airport (TIA) in Kathmandu
*****PLEASE NOTE THAT THE FOLLOWING INSTRUCTIONS ARE LIKELY TO CHANGE DUE TO ADDITIONAL COVID-19 PROCESSES****
Follow the step by step process outlined below to help you get through the potential chaos of the airport in Kathmandu with a little more ease.
- Step 1: Self service machines for your visa application and Arrival Card. The Arrival Cards are small slips of paper, normally in piles on the tables to your left as you enter the immigration hall. Take one and complete it while you are in the queue for Step 2. Then proceed to the self-service visa application machines, which are a little further on your left. Have your passport ready as well as the name of your hotel. (don’t worry about the street name, just type in anything) and request a 15, 30 or 90 day visa. If you need assistance, there should be someone to help you. The machine will print out a ticket that you will give to the payment counter as well as the immigration official in Step 3.
- Step 2: Pay for the visa. Go to the counter that it at the far end of the hall when you entered. Have US cash ready $30, $50 or US$125 depending on the length of you visa (15, 30 or 90 days). You can also request to pay by credit card, but this will delay you until there are enough other people who also want to pay this way. They will give you a receipt.
- Step 3: Immigration. Go to the designated immigration counter for your visa duration. Give them your passport, the completed Arrival Card, the ticket from Step 1 and payment receipt.
- Step 4: X-Ray. Go downstairs (escalator) and line up to go through a metal detector and to put your carry-on luggage and handbags through an X-ray machine. They are looking for smuggled gold (not your jewelry or watches etc.). This can be a bit uncomfortable as there may be a lineup back to the bottom of the escalators and they squeeze all arrivals through two machines. You may have to take off your belt and watch.
- Step 5: Luggage pick-up. As you get past the x-ray machines you will face the madhouse of the luggage pick-up area. Pick up a cart nearby, if needed. You may have to wait some time for your luggage to come out to the carousel. Check for which carousel has your luggage, and if it does not come, check the other carousels, as they are not always on the assigned one. If there are many bags on the carousel, airport staff will have already started taking some off in a haphazard way, so if you can’t see your bag look around for a place where it might have been left.
- Step 6: Luggage check. Make sure that you have you boarding pass with the luggage ticket taped to the back. There will be someone looking at them to make sure you are picking up your own bags. Go towards the right of the carousels and turn fight toward the exit. There is a possibility your luggage will be X-Rayed again if customs suspect your are bringing in precious metals and/or religious artifacts.
- Step 7: Getting out of the building. Continue past the baggage check people and you will see the door. There are pre-paid taxi counters here and a place to buy NCell SIM cards. If comeone is meeting you, they will be waiting outside and hotel pick-ups are grouped together on the far side of the access road.
Congratulations! You are now in Nepal!
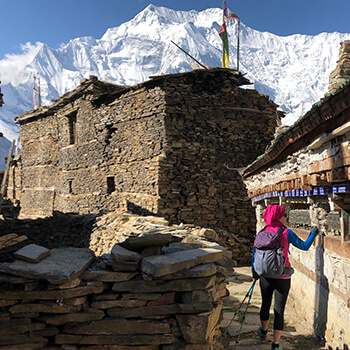
India: Visas and Permits
In comparison, the tourist visa application process is amazingly simple compared to Nepal. Just make sure you apply through the official Indian Government website (www.indiavisaonline.gov.in) and not through on-sellers.
So, that’s the good news! Also trekking anywhere away from Inner line areas is also super easy and paper-free. However, the whole situation changes when you need an Inner Line Permit (ILP).
Finding out which permit you need, how to apply for it and then tracking the people down who will actually issue it is a major challenge. If you do not have spare time or patience it is recommended you work through a local trekking operator. But beware, many operators promise much and deliver nothing. Throughout the process remain calm, confident and in good humour.
Magistrate Letter for Darma Valley / Johor (Milam) Valley / Kagudi Bhel Pass / Darma valley, Ralam Dhura and descent to Budgyari (near Munsyari).
All require permission from a magistrate who will CC a letter to each ITBP post and the other magistrates. This is not hard to get but does involve some running around:
- Find where a Divisional Magistrate (DM, in Pithoragarg) or Sub-Divisional Magistrate (SDM, in Darchula, Didihat and Munsyari) is currently working as holidays/festival/field trips mean they are not always in their office.
- Take all key staff (guide, cook, etc) and clients. If possible take all staff.
- Have photo ID for everyone (tourists – passport original and copies, visa copies, photos, locals – driving licence or similar)
- Provide copies of health certificates (from your GP or local doctor) for each tourist.
- Write a letter similar to the following, present it with a nice smile and be patient.
SAMPLE LETTER FOR INNER LINE PERMIT APPLICATION
This letter format may need to be adjusted due to Covid-19 or other additional requirements – please check with the issuing office before submission.
Your Address
Magistrate Name Date
Magistrate Address
Dear Sir,
Re: Trekking group from <Start> to <End> via <all major passes and ITBP posts>
We are writing to inform you of our intention to trek from <Start> to <End> via <major passes> beginning from the <Start Date> and finishing on the <End Date>. We are a group of highly experienced trekkers and field staff who are qualified*, trained in first aid*, have adequate medical and evacuation insurance* and are all in excellent health and physical fitness.
We request that you provide us with a letter that has been circulated to all relevant authorities notifying them of out intended route, to permit free passage and not to obstruct our progress at any time. Below is a copy of our itinerary by day and attached are copies of passports, visas or photo ID where appropriate, health certificates and photos for each member of trek.
ATTACH or INCLUDE:
- Day-to-Day Itinerary
- Day – Camp – make sure you include the name of every ITBP post and major village you intend to pass
- Group List – first clients then crew
- Name – job title (trekker, guide, cook, etc) – place of residence (Country or state within India)
Sign and date by group leader
Bhutan: Visas and Permits
Many people say that Bhutan is a super expensive place to visit, but when you consider what is included in the price it actually works out to be less than 10% more expensive than a camping trek in Nepal!
BUT forget about solo, independent trekking anywhere… it’s only groups (can be only of one person) and fully packaged camping treks.
So when you book a trek in Bhutan, all of your visas and permits are included in the price and the travel agent does all the running around… take a big sigh of relief… and that’s why Bhutan is such a relaxing, rejuvenating, wonderful place to go… it’s just so easy.
The Last Step is Now – Travel Insurance
Basically, you can’t afford to go trekking if you can’t afford travel insurance – so please take the next section seriously…