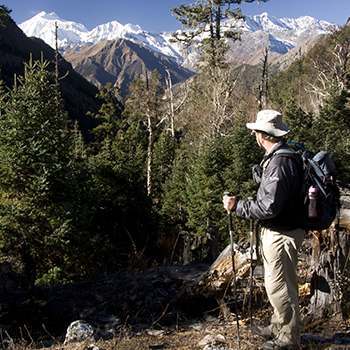
Mountain Clothing and Equipment
In Nepal, Kathmandu has several outdoor shops that sell a broad range of mountain clothing and equipment for anything from light day treks to high-altitude expeditions. Prices and quality vary enormously and it is wise to know what to look for in a product as shop staff will promise the world. In general, it is wise to equip yourself at home as you then have the opportunity to wear-in and become familiar with your kit. This may be something as simple as getting used to carrying things in certain pockets, to breaking-in your boots, to developing an exercise program around an increasing pack weight.
The choice in India and Bhutan is far less, so it’s best to gear up as much as possible at home. If you do need to buy some things in Delhi, there are some outdoor stores but you will need to know exactly what you are looking for as advice is pretty basic.
There is a ton of information on Mountain Clothing and Equipment that covers:
- Footwear
- Packs and Adjusting Them
- Trekking Poles
- Clothing Choices
- Sleeping Bags
- Shelter and Cooking Gear
- Power and Re-Charging
- Miscellaneous Tips and Ideas
- Gear Lists
- And finally, How to Go Ultralight on the GHT!
there is no such thing as bad weather, there are only bad clothing choices
Footwear
You are about to embark on a walking holiday so choosing footwear is normally the first equipment decision. Be prepared to take a considerable amount of time to shop around reputable outdoor-gear shops and find the boots that fit you perfectly; make sure that there is no discomfort when you wear them! Your feet will swell and become more sensitive at altitude, your sense of balance may change and the terrain may provide unknown challenges, so a full boot that immobilises the ankle joint and has excellent grip is advisable. It is relatively simple to adjust lacing for varying thicknesses of sock, so pack a few different types to suit terrain and climate. Thin, skin-hugging liner socks are always a good idea for longer treks as they reduce the need to launder thick socks (which are hard to dry), and help to keep the skin surface dry (thus reducing the chance of blistering). You also need a pair of light shoes or sandals to wear when you finish trekking for the day. These will allow your feet to dry out and relax. Sandals can also be used for river crossings, and when showering.
Top tip: To let your boots breathe out moisture overnight open them up by pulling the tongue forward. This is a good habit when in freezing temperatures as it will make them much easier to put on in the morning!


Packs
The range and methods of using packs is almost limitless, whether you are carrying all your own equipment, or just a small daypack. The majority of trekkers use a 40-litre (2200 cu in, or thereabouts) pack for all the items they are likely to need throughout the day and a kit bag (carried by a porter or pack animal) to stow the remainder of their equipment. Packs should have a number of generic features, like at least one lid pocket for bits and pieces, external stash pockets and compression straps, and a method of keeping wet and dry gear separate. However, the most important feature of a pack is that it should fit properly and that you learn how to re-adjust it.
The back panel length of a pack should match your own back length, try on different models and check in a mirror to see if the lengths match. You should understand the principle and placement of balance straps and how to adjust a harness to fit. It is inevitable that your pack will need readjusting at some point on the trail and knowing how to do this is as important as knowing how to lace your boots. The kit bags a trekking company might give you to stow spare equipment are not waterproof so to protect valuables, your sleeping bag and spare clothing against water damage use roll-top, durable, waterproof stuff sacks.
ADJUSTING YOUR RUCKSACK
Begin by adjusting the harness system with no weight in the pack, then once you think the pack is as comfortable as possible put roughly your average carry weight inside the pack and try it on again. Try to distribute the weight inside the pack as you would for a trip – the ideal is to make the load distribution as realistic as possible. Walk around for 10-20 minutes to feel how the harness performs as you move – this is the only accurate way of appraising a harness system. To adjust the harness:
- Loosen the pack’s shoulder straps, top stabiliser straps and hip belt.
- Lift the pack using the haul loop (never lift or move the pack with the pack harness – and slide your arms through the shoulder straps.
- Bend over so that the pack sits on your spine allowing you to adjust the straps without the pack sliding down your back.
- First do up the hip belt making sure that it straddles your pelvis (iliac crest) and then tighten the straps. Note that the two ends of the hip belt should not be touching, nor pushing into your stomach.
- Cinch the shoulder straps so that they fit snugly (no gaps should be visible) over your collar bone – check that the top stabilisers connect with the pack about 3cm above your shoulder. The shoulder straps should not compress your spine, nor restrict your arm movement – they are there to take about 20% of the load, the hip belt takes the rest.
- Adjust the shoulder and hip stabiliser straps for comfort. The pack should not swing or bound as you walk, it should remain stable over your natural gravity. Make sure that the shoulder straps do not extend beneath your armpits; they will chafe if they do. Use the sternum strap to prevent the shoulder straps from slipping sideways and make sure that you do not hit your head on the pack when you look up.
- Now check for comfort by moving around. Walk up and down stairs, crouch down, hop from spot to spot and move your arms about – make sure that the harness is not causing any irritation or overly restricting movement.

Trekking Poles
If you want to be walking in your dotage use trekking poles now! The prolonged impact of steep downhill on ankles, hips and especially knees will have a noticeable effect on everyone in your group. The best and most reliable method for reducing shock on joints is to use trekking poles – that’s a pair of collapsible poles, not a single stick. It is wise to purchase them well before your trek so that you have time for their use to become second nature.
And this is not advertising endorsement – just a personal observation from having used many, many brands of trekking pole – I think Black Diamond are the best.
Clothing
The expression, ‘there is no such thing as bad weather, there are only bad clothing choices‘ perfectly describes your choices for trekking clothing.
There are days that barely an hour goes by without having to make some adjustment to your clothing so most trekkers and mountaineers rely on a series of clothing layers while on the trail. When you think about layers there are three distinct types of fabric:
- Next-to-skin fabrics are soft, easy to launder (that is, they dry quickly) and may be thermally insulating. Three, or even four, different fabrics are ideal: (1) for warm to hot conditions – a very light synthetic that can dry in minutes, is UV resistant, and has an antibacterial treatment; (2) for cool to warm conditions – a light long-sleeved top with a pocket, that can be worn as sun protection or as a lightweight insulator on a cool evening; (3) for cold to cool conditions – a thermal fabric that can be worn all day or as a night shirt; (4) for very cold conditions – a very warm thermal shirt for high altitudes or very cold nights. It is also handy to have a loose-fitting, well-ventilated synthetic shirt for warmer or more humid days. Cotton is NOT advisable next to your skin in the mountains as it can increase the chances of hypothermia.
- Mid-layer fabrics include synthetic fleece garments for warmth, especially when you stop walking and need to protect against a sudden cooling, and soft-shells for warmth in wind and/or light rain. Soft-shell garments come in an enormous range of combinations; the most popular are lighter-weight fabrics that can be worn while walking in a cold wind so that you don’t have to put on your weatherproof shell. However, it is important to make sure that the garment provides some insulation, and is made from a fairly tough fabric, as you will be wearing it under your pack harness at some point.
- Shell fabrics are 100% waterproof and windproof, preferably breathable, and/or well ventilated. Whenever you venture into the Himalaya it is essential that you always carry a waterproof jacket and pants. Pit-zips (under-arm zips) or similar ventilation is a good way to prevent condensation from building up, especially in less-breathable garments.
You should also pack a sun hat, warm hat, warm and weatherproof gloves, a light pair of liner style gloves, and a light scarf to wrap around your face on dusty sections of trail, especially when a train of yaks goes past!
Lightweight walking trousers/pants with detachable legs have become popular with some trekkers. For cultural reasons this might not be a good idea in some areas.
Sleeping Bags
You are going to spend roughly one-third of your holiday in your sleeping bag so it is worth making sure you’re comfy inside it! The European Union has introduced a sleeping bag insulation rating system, which is a good method of comparing and choosing a bag. Most treks in Nepal require a bag that can keep you warm at -10°C but that you can also sleep in when it’s 15° or 20°C at night.
A full side zip, and preferably a foot zip, adds a little weight but it makes your bag more versatile across a broad range of temperatures. It is also a good idea to use a sleeping bag liner to prevent body oil or sweat from making your sleeping bag smelly. Silk liners are a popular choice as they are lighter, easier to launder and slightly warmer than those made from cotton.
A good-quality insulation mat is also recommended for teahouse and camping trekkers alike. In most teahouses you are provided with a foam mattress, which can have a well-worn pit in the middle, which an insulating mat will negate. Camping treks sometimes provide sleeping mats but it is normally a good idea to take your own mat as well, unless you are certain that you will be comfortable and well insulated from the ground.
Top Tips
- Check the size of any trekking equipment you are given by the trekking company before you begin your trek and make sure it is the right size, especially the sleeping bag! If you are not a standard size it might be better to purchase your own things.
- Don’t overdress in your sleeping bag. Try to minimise redundant air space inside the bag – let the sleeping bag insulation do its job! If you are still cold, add layers to the outside of the bag rather than putting too many layers on your body.
- Barking dogs are common across the Himalaya, so take some ear-plugs if you are a light sleeper.

Shelter
Nearly all camping treks will provide tents for the trip. However, if you want to take your own for an independent trek it is worthwhile to choose one that: (1) can withstand extreme winds – such tents are normally rated as ‘alpine’, ‘4 season’ or ‘extreme’; (2) has enough room for people and gear as sometimes it is unsafe to leave your kit in a vestibule; (3) is well ventilated – most treks start in the hot and humid lower valleys before climbing in to alpine regions.
Bring a footprint or light tarp for use on wet ground, and carry an extensive field repair kit, as even glue can be hard to find in the hills.
Cooking Gear
If you are planning to do a teahouse trek to high altitudes and/or out of season (when the chance of snowfall is higher) a small gas stove is a good safety measure. Some people find it very difficult to sustain body heat at altitude and the ability to quickly prepare a hot drink can prevent frost nip or frost bite. Gas fuel is widely available in Kathmandu.
Camping groups tend to prefer locally made heavy kerosene stoves, as they are robust and easy to maintain. For expedition-style treks the MSR Whisperlite International® and MSR XGK Ex® models both burn widely-available low-grade kerosene (good-quality fuel is rare in Nepal) and are fairly easy to field maintain; it is essential that you carry a field repair and maintenance kit for your stove as it will clog and require cleaning on a regular, almost daily, basis.
Power and re-charging on the trail
Re-charging electrical devices while in the hills can be problematic. Many villages have at least one building with a solar panel connected to a 12V battery to provide low-wattage lighting. These set-ups often look very rudimentary with bare wire connections, but they can be a useful source of power in an emergency. It is now commonplace to pay a per hour rate for charging from a local battery (roughly US$4 per hour). Alternatively, purchase one of the many compact and lightweight solar panel and in-built battery chargers.
Many satellite phones require higher ampage outputs than regular mobile phones and they may require additional connectors. This is also true of different generation iPods and other MP3 players for which you may need to purchase special adaptors.
Solar-charging times are often more than eight hours so you might need to consider two chargers for longer trips or during cloudy months (eg before and during monsoon). Thorough testing of your charger with your device is highly recommended prior to embarking on your trek.
Miscellaneous Trekking Equipment
And now some tips and ideas for all the bits and pieces of trekking equipment and gear that can make a huge difference on the trail!
Perhaps the most useful item you will need is a head torch: for reading in bed, finding gear in the bottom of bags and to be hands free in the toilet. An essential piece of equipment is a water bottle or bladder, which should ideally have the capacity to carry a minimum of two litres. You also need to pack bio-degradable soap, a travel towel, and general toiletries in a waterproof bag.
Instead of cotton hankies, which can become quite unpleasant, it is a good idea to use lightweight kitchen cloths (for example Chux®, Super Wipes®, J-Cloths®), these are very easy to clean, dry incredibly fast and weigh very little. Use different colours for hankies and washing yourself as it’s a good idea to know which is which!
Technology in the shape of a GPS or wrist-computer can be invaluable when used as a backup to a map and compass (declination in most of Nepal is a marginal 2 or 3°) but make sure you carry enough batteries that will continue to work in cold conditions.
Waterproof stuff sacks of different colours make identifying items very easy. Clothing items are quickly found in heavy-duty transparent compression bags, Eagle Creek® make some good ones. A spare bag for a clean set of clothing to be left in Kathmandu should be lockable, and take another lock for your on-trail kit bag. Small zip lock bags (sandwich size) are handy for toilet rolls, bottles of liquid, and to protect your money and documents.
Think about what might break down on the trail and how you might carry out repairs. A sewing kit is handy, as well as a strong glue for boots, a polyurethane glue or sticky patches for when repairs need to be flexible, a repair kit for your sleeping mat, enough spare batteries (those available in Kathmandu are frequently adulterated), a pen knife or multi-tool of some description, and a length of 3 or 4mm cord as a washing line, spare laces, etc. If you write a diary it is worth carrying some spare pens, and a few photos of your family and friends will help to build new friendships wherever your path takes you.
The lists below are designed for camping groups who want to explore remote regions; if you are teahouse trekking you can omit many items!
Top tips
- Use stick deodorants as pump action and liquid roll-ons tend to leak at altitude and aerosols are very cold.
- Take a few tampons for (1) packing or dressing deep cuts, (2) a fast way to help light a fire, and (3) just in case any women in your group should need some. It’s also a good idea to pack some condoms, as they are useful for making hand and foot dressings waterproof.
- Use iodine gargle when you first feel a tickle in your throat as it is a great way to prevent infections.
- Always take spare lip-protector and sun cream.
- Honey or eucalyptus throat lozenges are great for high altitude and/or very dry environment trekking.
- Put hot water in your bottle or water bladder at night when in cold temperatures and use as it as a hot water bottle. Similarly, put cold water in your bottle in the morning when in hot temperatures.
- Bring some family photos and/or a magazine from your home country to show locals – it’s a great icebreaker and the local children will love to see where you come from.
TREKKING EQUIPMENT GEAR LISTS
Typical gear list for someone with a trekking group
Clothing
Waterproof jacket and trousers both ventilated (pit zips, side zips, etc)
Down jacket and maybe pants for high-altitude treks
Windproof soft-shell jacket and trousers for windy/cold days.
Fleece top and trousers
2 thermal tops
1-2 thermal long johns depending on how much you feel the cold
4 pairs of liner socks
2 pairs of warm weather walking socks
2 pairs of cool weather walking socks
Pair of cold weather walking socks that can also be used as bed socks
2 sets of underwear for cool/cold weather
2 sets of underwear for warm/hot weather
2 pairs of walking trousers
2 loose-fit trekking shirts with pockets
2 lightweight synthetic T-shirts
Pair of waterproof walking boots that can take crampons
Pair of sandals to let feet breathe in the evenings and for washing
Broad-brimmed sun hat
Warm hat and gloves
Polarising sunglasses with 100% UV protection
Buff or trekking scarf
General Gear
Sleeping bag rated to -15°C/ 3°F
Sleeping sheet and pillow (you will be given a pillow if you prefer)
Inflating sleeping mat (you will be given a mat if you prefer)
40-ish litre pack for trekking
Pair of trekking poles
Head torch and spare batteries
Sun block
Lip balm with sun block
Mosquito / fly repellent
Toiletry bag with essentials (no hairdryers!!)
Towel
Neck pillow for plane/bus trips if required
Camera with back-up batteries if needed
2-3 litres of water bottles or bladder system depending on consumption
Some waterproof compression bags for storage in tote bag (different colours)
Reading material/diary/spare pens
General repair kit
Tent for appropriate conditions
Tote bag for spare gear you do not carry
Pillow or stuff sack for clothing
Medical kit
Optional
Chair kit for sleeping mat
Shorts/costume for bathing/swimming in rivers
Closed cell foam mat
Sarong for sunbathing, around camp on hot days.
Typical gear lists for Climbers and Campers
Hardwear (for group of eight including clients). Note that this is a general indication of the sort of equipment you might need and not a definitive list – you MUST consult with trained and experienced experts before embarking on any technical trek or climb.
Crampons for each group member
Harness for each group member
Helmet for treks with rock fall hazard
Ice axe for each group member (or trekking pole if non-technical)
2 large slings >2m
2 medium slings 1.5-2m
Medium to large ice screw
60m static rope 8-9mm
2 screwgate karabiners for each group member
2 single prussiks for each group member
Snowstake/medium to large deadman
4 spare screwgate karabiners
Kitchen (minimum for group of eight including clients)
2 medium-sized bowls for food preparation and washing
2 medium-sized saucepans for cooking vegetables
Pressure cooker
Frying pan
Kettle
4-8 plates depending on weight considerations
4-8 soup bowls depending on weight considerations
4-8 cutlery sets depending on weight considerations
8 cups
Roti cooking plate
2 plastic jugs
Peeler
Small chopping knife
Large knife or cleaver
Ladle
Egg lift
Water jerry approx 20Lt
Kerosene jerry approx 20Lt
3 small towels
2 tea strainers
Chopping board for meat
Chopping board for vegetables
3 MSR stoves (EX model is best)
3m x 5m tarp
Kitchen tent or similar
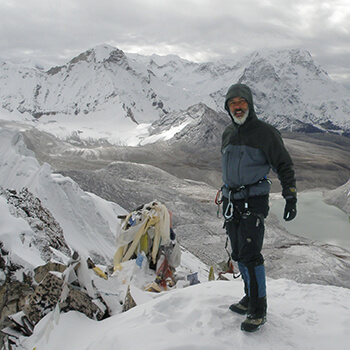
Ultralight and Unguided on the GHT
by Justin ‘Trauma’ Lichter, Author of Trail Tested: A Thru-Hiker’s Guide to Ultralight Hiking and Backpacking
The traditional way of hiking in Nepal involves guides, porters, and teahouses. This is the system most people use and what people envision when they plan a trekking trip in Nepal. Despite the overwhelming majority who participate in this fashion, it is not obligatory.
People can take the ultralight style of hiking and use it on the GHT. There are no predetermined weight classifications, but generally the ultralight paradigm encompasses carrying all the belongings you will need to be self supported in a kit that weighs less than 7 or 8 kilos, not including food, which will vary depending on the location and conditions. In some summer-time locations, packs can weigh as little as 2 or 3 kilos, without food.
Ultralight means paring down your kit to just the necessary items – those items that you use every day or almost every day. Then look at how you can save weight on those items. For example, use a down sleeping bag instead of a synthetic bag, or a 100g wind jacket instead of a bulky fleece. Look for items that will serve multiple purposes. You can use your trekking poles to help set up a tarp shelter. Ultra-lighters bring minimal full-changes of clothes, instead preferring a versatile layering system and thereby reducing the amount of clothes you have to pack.
Planning is also very important. If you have a good idea of the conditions that you may encounter then you can carry the proper equipment for those situations. If the temperatures will only hit the freezing mark at night you don’t need a -20-degree sleeping bag. If you carry a bag tailored for the conditions you will save the excess weight and space. Furthermore, you will be able to efficiently plan your food and water, without packing too much or too little. Food can weigh about 1kg per day per person and water is much heavier. If you are crossing streams every kilometer (like you do most of the time in the Himalaya), why carry 5 kilos of water?
People are hesitant to take an ultralight mentality into the Himalaya, for fear that it will let them down in the biggest mountain range in the world. However, if you have experience and are comfortable with your equipment a standard ultralight system is fully functional, despite the lofty elevation. Using an ultralight system increases self-sufficiency and comfort levels. You can cover longer distances and hike for more hours, while exerting less energy. Furthermore, you can carry more food weight to meet the demand of the long stretches on the GHT without resupply.
Overall the weather conditions that we faced on the GHT were not much different than many other thru-hikes that we have done. The nights were chilly when we were at high elevations and sometimes there were snow and whiteout conditions. Other days at lower elevations were warm and humid. Ultralight is not always right, but despite people’s hesitance to use ultralight equipment on the GHT, in my opinion it is practical, efficient, and without a doubt the right gear for the trail.
See Justin’s GHT Story here – www.greathimalayatrail.com/across-the-himalaya-with-justin-lichter/
So Now You’ve got the Gear!!
Now it’s time for what is often a sensitive and complex decision, BUDGETING, but follow our tips and suggestions and you’ll have no trouble finding working out How Much Do Treks Cost!